Technique
Muay Thai Shadowboxing Combinations With Defensive Exits
Build Muay Thai shadowboxing combinations with clear defensive exits, stance recovery, video review checkpoints, and safe revision drills.
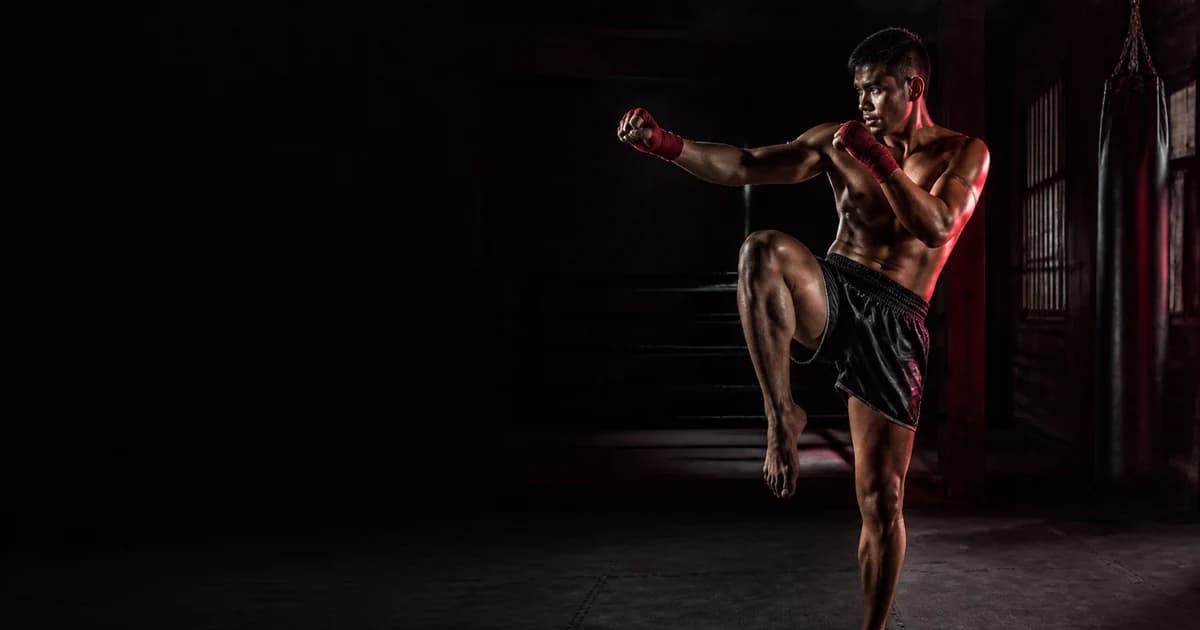
A useful Muay Thai shadowboxing combination should solve a complete exchange: enter at a believable range, strike with a clear purpose, respond to an imagined counter, and exit in a balanced stance. Start slowly enough to see the opponent’s position in your mind. Add speed only when you can finish the sequence without crossing your feet, dropping your guard, drifting off line unintentionally, or pausing before the defensive action.
Build complete exchanges, not isolated combinations
Throwing five strikes into empty space can improve coordination, but it does not automatically teach you how to manage an exchange. A complete shadowboxing sequence has four parts:
- Entry: Establish range or draw a reaction.
- Attack: Use two or three connected strikes.
- Defensive response: Anticipate a realistic counter.
- Exit or reset: Recover your stance at a safe angle or distance.
For example, do not stop after a jab-cross-lead hook. Imagine the opponent returning a right hand. Cover, pivot outside the returning line, and recover your stance before beginning another exchange.
Your chosen response should match the imagined counter. A check only makes sense if you have pictured a low kick. A rear-hand cover should correspond to a hook or overhand. A long guard, frame, step, parry, or angle change should solve a specific problem rather than decorate the end of the combination.
Competition rules determine which actions are permitted in a particular setting. If you are preparing for an event, confirm the current ruleset with your qualified coach and use the relevant governing body’s rules rather than treating a shadowboxing drill as proof that a technique is appropriate for every competition.
Use this observation, decision, and revision loop
Apply the same loop to every round.
1. Observe one complete repetition
Watch the sequence from the first movement through the final stance recovery. Look for evidence that the recording can actually show:
- Foot position and stance width
- Whether the rear heel and hip turn during a cross
- Guard position before and after each strike
- Head position relative to the imagined centre line
- Whether the support foot pivots during a round kick
- Where the striking leg lands
- Whether the exit creates a new angle
- Balance during and immediately after the defensive action
- Unplanned pauses between attack, defence, and exit
Do not start by judging whether the sequence “looks good.” Name the visible event. “My rear foot crossed behind my lead foot during the pivot” gives you something to revise. “My movement looked awkward” does not.
2. Decide which error matters first
Choose the error that most directly breaks the exchange. Use this order:
- Loss of balance or unsafe movement
- Failure to recover the stance
- Missing or inappropriate defensive response
- Incorrect range or foot position
- Guard and posture errors
- Rhythm, speed, or visual sharpness
Do not repair six details at once. A narrower task produces a clearer next round.
3. Revise one variable
Choose a specific correction:
- Reduce the combination from four strikes to two.
- Slow the round to half speed.
- shorten the pivot.
- Mark the intended landing position with tape.
- Pause in the recovered stance for one count.
- Replace a vague defensive movement with a named response.
- Remove power so you can control the return to stance.
Record another short set under the same camera angle. Compare the same checkpoint rather than searching for a different problem after every repetition.
Compact combination and exit guide
| Combination | Imagined response | Defensive exit | Primary review checkpoint |
|---|---|---|---|
| Jab, cross | Opponent returns a cross | Rear-hand cover, then step off line | Does the stance stay wide enough after the step? |
| Double jab, rear low kick | Opponent answers with a low kick | Recover and check | Does the kicking foot return before the check begins? |
| Lead teep, cross | Opponent advances after the teep | Long guard and angle step | Does the teeping foot return to stance before the cross? |
| Jab, cross, lead hook | Opponent throws a rear hook | Cover and pivot | Does the hook pull the body square before the pivot? |
| Cross, lead hook, rear round kick | Opponent pressures forward | Kick recovery and lateral exit | Does the kicking leg land under control? |
| Jab, rear knee | Opponent frames and disengages | Posture recovery and step out | Can you reset without leaning backward? |
These are drill structures, not automatic answers to every opponent. Change the response when you change the imagined opponent, range, or reaction.
Use the teep technique guide when the push kick does not return cleanly to stance. For problems with the support-foot pivot or kick recovery, review the Muay Thai roundhouse kick guide. If your sequence ends with a low-kick defence, compare your position with the checkpoints in the leg-kick checking guide.
Make the imaginary opponent specific
Before each round, define five details:
- Orthodox or southpaw stance
- Approximate height and reach relative to you
- Starting range
- Expected reaction to your entry
- Counter that triggers your defence
A usable prompt might be: “The opponent stands orthodox at the edge of punching range. They step back from my jab, hold position after my cross, and return a rear low kick.”
That prompt gives every movement a reason. You step with the jab because the opponent begins outside your range. You avoid overreaching on the cross because they stop retreating. You recover the rear foot promptly because you expect the low kick. You check, place the checking foot down in stance, and exit before restarting.
Change only one opponent variable when the sequence becomes repeatable. If you switch stance, range, reaction, counter, and combination at the same time, you will not know which change caused the breakdown.
Worked example: jab, cross, lead hook, cover, pivot
Assume an orthodox-versus-orthodox exchange. The imagined opponent remains near punching range after your jab and cross, then returns a rear hook after your lead hook.
First round: establish visible evidence
Record three controlled repetitions at roughly half speed. Do not chase snap or power.
On review, suppose you see the following:
- The jab begins from stance.
- The cross rotates the rear hip, but the rear hand stays low after returning.
- The lead hook shifts too much weight over the lead foot.
- The cover starts after a visible pause.
- The pivot narrows the stance until the feet almost meet.
The recording supports those observations because it shows positions and timing. It does not establish that you felt tired, intended to draw a counter, feared the hook, or experienced resistance. It also cannot show anything outside the frame.
Decision: fix the stance before the rhythm
The feet nearly meet during the exit, so stance recovery takes priority over the low rear hand and delayed cover. Reduce the drill to lead hook, cover, pivot. Place two small floor markers where you want the feet to finish.
Second round: revise the pivot
Perform three slow repetitions. Keep the pivot small enough to maintain stance width. Freeze for one count after the exit.
Review only these questions:
- Did the lead foot turn without sliding too far?
- Did the rear foot follow without crossing or meeting the lead foot?
- Did the hips and shoulders finish in a usable stance?
- Could the next jab begin without an extra adjustment step?
If the answer remains no, shorten the angle. A controlled 20-degree change is more useful than a dramatic turn that leaves you unable to strike or defend.
Third round: rebuild the exchange
Restore the jab and cross. Keep the same exit and floor markers. Add the cover immediately after the lead hook, but retain moderate speed.
Compare the first and third recordings using the same camera angle. Look for a more stable final stance and a shorter delay before the cover. Do not claim that the revision improved power, confidence, reaction speed under pressure, or competitive performance. Shadowboxing video cannot establish those outcomes.
After you have recorded a complete round, use Muay Thai AI: Kru Coach to review the training video, then carry one visible stance, guard, or timing correction into your next three-repetition set.
Choose exits that fit the range
An exit is not always a large pivot. Select it according to the position you created.
Step out
Use a controlled step out when the exchange ends near the limit of the opponent’s range. Maintain stance width and avoid pulling the head straight back while leaving the feet behind.
Lateral angle
Step laterally when remaining on the centre line would invite a direct counter. Move the lead foot first when stepping toward the lead side, then recover the rear foot without crossing.
Pivot
Use a pivot when you need a sharper angle at close punching range. Keep the turn compact. A wide spin can expose your back or leave you too square to continue.
Long guard or frame with movement
A long guard or frame should create structure while your feet move. Do not lock the elbow or reach so far that your weight falls over the lead leg. In shadowboxing, show the position without pretending that you can feel or control an opponent’s head, shoulders, or forward pressure.
Clinch transition
If the exchange enters clinch range, shadowbox the entry, posture, hand position, knee action, and disengagement under control. Air practice cannot reproduce grip fighting, balance disruption, or an opponent’s resistance. Use the clinch basics guide to define technical positions, then practise live clinch work only with appropriate supervision and consent.
Film rounds that you can compare
Use a stable camera position and record short sets. Three to five repetitions often reveal more than a long round in which distance, pace, and camera position keep changing.
For a general combination, place the camera around hip-to-chest height and far enough away to include your head, hands, and both feet throughout the exit. A front three-quarter view usually shows stance width, guard return, hip rotation, and lateral movement. Add a side view when you need to inspect leaning, reach, or the return of a teep or knee.
Keep these variables consistent between comparisons:
- Camera height and distance
- Floor position
- Combination
- Imagined opponent
- Starting stance
- Intended counter
- Repetition speed
Use adequate light and avoid loose objects in the training area. Check the frame before the round. If the feet leave the picture, the video cannot support conclusions about stance, pivot, or balance.
For a repeatable scoring process, use the site methodology to separate observations from conclusions and compare like-for-like recordings.
What video can and cannot tell you
Video can provide visible evidence about joint position, posture, stance, sequence order, movement direction, and approximate timing within the recording. It may also reveal that your chosen defence does not match the response you described.
Video cannot independently establish:
- How hard a strike would land
- What you felt during the movement
- Your intent unless you state it
- An opponent’s likely reaction
- Resistance or impact that never occurred
- Fatigue that is not visibly demonstrated
- Pain, injury, or a medical cause
- Actions outside the camera frame
- Whether a movement will work in sparring or competition
Treat sensations as separate notes. You can write, “I felt pressure in my knee during the pivot,” but the recording cannot diagnose the cause. Stop the drill if you feel pain or lose safe control. Seek appropriate guidance from a qualified coach or healthcare professional rather than using video feedback as a diagnosis.
Common shadowboxing errors
Throwing without a target
Choose a target height and range for every strike. A jab aimed vaguely into space makes the following cross and hook difficult to evaluate.
Finishing after the final strike
The final strike is not the end of the exchange. Add a credible defensive response and recover before relaxing.
Moving faster than the feet can organise
If speed causes crossed feet, uncontrolled landings, or skipped defensive actions, slow down. Restore speed in small increments after the stance remains stable.
Performing a defence with no imagined counter
State the counter before the repetition. If you cannot name the threat, remove the defensive movement or choose one that fits.
Making every exit a large angle
Use the smallest movement that clears the intended line while preserving stance. Excessive pivots often create an extra recovery step.
Treating shadowboxing as proof against resistance
Shadowboxing develops rehearsal, coordination, and visible technical organisation. It does not reproduce impact, grip pressure, opponent timing, or decision-making under live resistance.
Changing several variables between recordings
Keep the camera, sequence, pace, and opponent prompt consistent. Revise one variable so the comparison remains useful.
Safety limits
Clear enough space for every kick, pivot, and step before recording. Use a stable, non-slip surface. Control elbows, knees, and spinning movements when walls, furniture, people, or pets are nearby.
Do not turn a shadowboxing session into unsupervised return-to-training testing after pain or injury. A recording cannot clear you for training. Stop if you experience pain, dizziness, loss of balance, or another concerning symptom, and consult an appropriate professional.
Follow your gym’s safety procedures, your coach’s instructions, and the safeguarding standards relevant to your training environment. Keep partner drills and sparring separate from solo video review. Those activities require consent, control, suitable equipment, and qualified oversight.
Final checklist
Before the round:
- Define the opponent’s stance, range, reaction, and counter.
- Choose a short striking sequence.
- Match one defensive response to the imagined counter.
- Select an exit that preserves stance.
- Clear the floor and frame your whole body.
During the round:
- Keep the first repetitions slow and controlled.
- Aim each strike at a specific target.
- Recover every hand and leg deliberately.
- Complete the defence before the exit.
- Finish balanced and ready to strike again.
During review:
- Record only visible evidence as fact.
- Separate sensations, intent, fatigue, resistance, and pain from visual observations.
- Choose the highest-priority error.
- Revise one variable.
- Record the same sequence again under comparable conditions.
- Take the correction into pad work or supervised training when appropriate.